
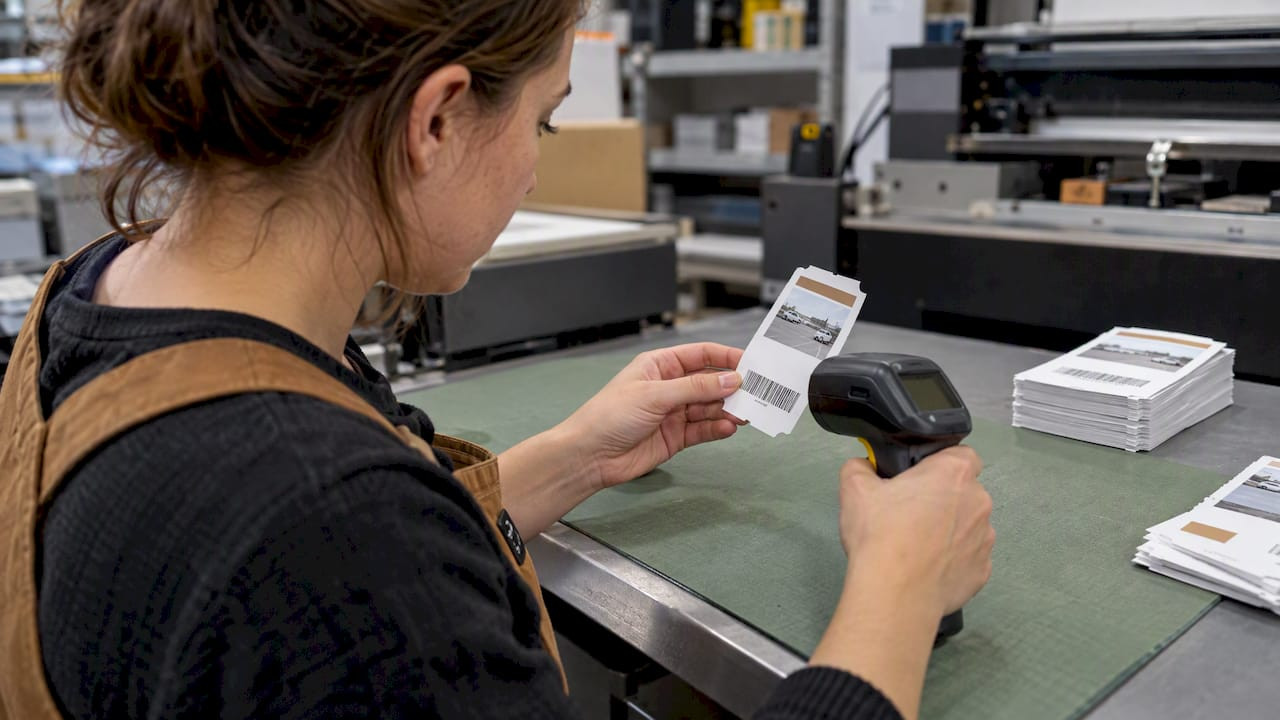
Print Proof Checklist: Catch Ticket Barcode Errors Before Signoff

Use this ordered print proof checklist, specs, layout and trim, images, color, fonts and files, barcodes, finishes, pagination, and a recorded sign-off, to catch the issues that cause reprints. Work through each group before you approve anything, and require a hard proof for color-critical or finished pieces. A recorded, timestamped sign-off on the exact final file closes the loop and protects everyone once production starts.
TL;DR:
- Use the printer’s specification sheet for bleed, color profile, and export settings; a common bleed is 0.125 inches, but requirements vary.
- Request a physical proof on the actual stock for brand critical colors, specialty materials, complex finishes, or fine security details such as microtext.
- Test barcodes after finishing on the actual stock with a verifier and representative scanners, because coatings can impair scanning despite a clean digital proof.
- For multipart tickets, sample the run’s beginning, middle, and end; verify numbering across every layer and match each printed number to its barcode.
- Choose ticket stock for its environment: thermal stock can fade in heat or sunlight, while outdoor tickets may need coatings that resist moisture and abrasion.
Table of Contents
- How to use this print readiness checklist
- Job specs and order details to verify
- Layout, bleed, trim, and safe area checks
- Images and resolution checks
- Color mode, spot checks, and hard proof decisions
- Fonts, file integrity, and export settings
- Barcode and QR code verification before production
- Special finishes, die cuts, and folds
- Page order, pagination, and binding checks
- Final approval: recorded sign-off and version control
- Cross-checking numbering and sequential order accuracy for multi-part tickets
- Verification of security features for ticket printing
- Ticket stock durability considerations for your usage environment
- Production specialist notes: practical traps and quick wins
- Caymil’s approach to print-ready ticketing
- FAQ
- Sources
How to use this print readiness checklist
Run the checklist top to bottom and mark each line as pass, fail, or not applicable rather than skipping items that do not seem to apply. The printer’s specification sheet is the single source of truth for bleed amount, color profile, and export settings, so check your file against it, not against habit or a previous job. Keep one approved file per project, with version numbers in the filename, and decide early whether a softproof is sufficient or whether the job needs a physical proof.
- Work through specs, layout, images, color, fonts, barcodes, finishes, and pagination in that order.
- Match every setting against the printer’s spec sheet rather than assumptions from prior projects.
- Save one clearly versioned file as the approved master once sign-off happens.
Job specs and order details to verify
Before anything else, confirm the order-level details match what was quoted, because a mismatch here affects cost, timeline, and the finished product regardless of how clean the artwork is. This is also where special stock or custom finishes typically introduce longer lead times, so flag anything nonstandard before you lock in a delivery date.
- Confirm quantity, paper stock, coating or lamination, and binding type against the original quote.
- Check whether a specialty stock or an unusual finish changes lead time or limits later quantity adjustments.
- Verify that finish-specific requirements, such as foil stamping or spot varnish, are reflected in both the artwork and the approval document.
Layout, bleed, trim, and safe area checks
Trimming and finishing remove a thin margin around every printed sheet, and any live content sitting too close to that edge risks getting cut off or ending up crooked. Confirm the trim size in exact units, check that bleed matches the printer’s spec (commonly 0.125 inches), and keep text and logos inside the safe area.
- Verify trim dimensions precisely and confirm bleed matches the printer’s stated requirement.
- Keep dielines and cutlines on a separate layer from the artwork itself, never baked into the design.
- For folded or multi-panel pieces, check that panel widths are correct and that no critical element crosses a fold line unintentionally.
Images and resolution checks
Soft or pixelated images are one of the most common reasons a proof gets rejected, and they are also one of the easiest problems to catch before a file goes to press. Raster images should sit at 300 DPI at final print size, or whatever resolution the printer’s spec calls for, while logos and icons print cleanest as vector artwork.
- Confirm every raster image meets 300 DPI (or the printer’s specified resolution) at the size it will print.
- Zoom to 100% and inspect for compression artifacts, color shifts, or unintended cropping.
- Make sure linked images are embedded or packaged with the file, since a stray low-resolution web image is an easy miss.
Color mode, spot checks, and hard proof decisions
Color problems rarely show up on a monitor the way they do on press, which is why confirming color mode and Pantone naming matters before approval. Check that the file uses the correct mode, CMYK or a specified spot color, and that Pantone references are named consistently throughout.
Rich black and plain black behave differently in print, so flag which one is intended and verify total ink coverage stays within the printer’s limit to avoid set-off on coated stocks. For brand-critical colors, specialty stock, or complex finishing, request a hard proof, ideally G7-calibrated, before giving approval. A structured verification sequence, preflight the file, review a soft proof for content, then print a hard proof on the actual stock, catches both digital and mechanical problems before they reach full production, according to Dalim’s preflight guidance.
- Confirm color mode and consistent Pantone naming match the creative brief.
- Flag rich black versus plain black usage and check total ink coverage against the printer’s limit.
- Request a hard proof for brand-critical jobs, special stocks, or heavy finishing.
Pro Tip: Ask your printer for their target ∆E tolerance on brand colors before you approve, so you know what “close enough” actually means on press.
Fonts, file integrity, and export settings
A font substitution or a missing linked file can quietly reshuffle an entire layout between your screen and the press. Running through file integrity and export settings as a final pass, rather than relying on memory, prevents that kind of silent damage.
- Outline or embed every font, and check for missing glyphs in any special characters or diacritics.
- Remove hidden layers and non-printing elements, and confirm all linked assets are embedded rather than referenced externally.
- Export according to the printer’s request, a PDF/X variant if specified, with crop marks and bleed included, flatten transparency only if asked, and save under a clearly versioned filename.
Barcode and QR code verification before production
Barcodes fail more often from finishing and substrate issues than from the original file, so verification belongs in the proofing stage, not an afterthought once tickets are printed. Validate symbology, X-dimension, quiet zone, and contrast against GS1 and ISO guidance before anything goes to press, since these standards set the minimum quality thresholds that retail and venue scanners expect, according to the GS1 2D barcode playbook.
ISO/IEC 15415 grading gives a numeric, verifiable quality score for printed 2D barcodes, which means a verifier report can confirm pass or fail rather than relying on a visual check, per the GS1 2D Barcode Colour & Quality Guide. We cover the practical fix for quiet zone violations, a common cause of failed scans on ticketing products, in our barcode quiet zone guide.
- Confirm symbology, X-dimension, quiet zone, and contrast match GS1 or ISO specifications before production.
- Run a verifier test on a printed proof and scan it with representative handheld and mobile scanners.
- Keep barcodes off folds, seams, and reflective stock, and never let logos or decoration intrude on the quiet zone.
Special finishes, die cuts, and folds
Finishing steps can shift registration or obscure content in ways that are hard to predict from a flat digital file. Verify die lines and fold locations sit on their own layer, separate from the artwork, and check registration tolerances for anything involving foil or embossing.
- Keep die lines, fold marks, and artwork on separate layers so finishing instructions never get mistaken for design elements.
- Confirm spot coatings and varnishes are marked on a dedicated finishing layer with correct trapping and overprint settings.
- Request a hard proof whenever finishing involves tight registration or a complex multi-step process.
Page order, pagination, and binding checks
Multi-page and bound pieces introduce their own failure points, mainly around sequence, spine width, and gutter loss. Confirm the final page count and imposition match what was planned, and check that spreads line up correctly at the trim and bind edge.
- Verify spine width calculations match the chosen paper stock and that spine text stays centered and legible.
- Check running headers, footers, and table of contents alignment against the final page numbers.
- Confirm page numbers remain accurate once imposition reshuffles the page order for printing.
Final approval: recorded sign-off and version control
Once every check above passes, approval needs to happen in writing, tied to a specific file, not a verbal “looks good.” An explicit, timestamped sign-off removes any ambiguity about which version goes to press, a point echoed in ApproveTrail’s artwork approval checklist, which notes that a versioned approval gate and a single final file are the simplest defenses against reprints.
- Record an explicit, timestamped sign-off that names the approver and references the exact approved filename and version.
- Treat that sign-off as a hard gate: any change afterward requires a new proof and a fresh approval, no exceptions.
- Store the approved proof, the sign-off record, and any accompanying comments together as an audit trail for future reference.
Cross-checking numbering and sequential order accuracy for multi-part tickets
Multi-part valet and parking tickets depend on numbering that stays synchronized across every part of the set, the stub, the claim portion, and any barcode or magnetic stripe component. A single break in that sequence, a repeated number, a skipped range, or a mismatch between the printed number and its corresponding barcode, can cause lost vehicles, disputed claims, or failed scans at the point of use.
Before approval, pull a sample from the beginning, middle, and end of the run and confirm the numbering increments correctly across every part. Check that any barcode or magnetic stripe encoding matches the human-readable number printed alongside it, since a disconnect between the two is easy to miss on a screen but obvious the moment a scanner rejects a ticket. For carbonless multi-part formats, confirm the number prints identically and legibly through every layer, not just the top sheet.
If the job includes a specific numbering range requested for a particular lot, location, or event date, verify that range against the purchase order rather than assuming the printer’s default sequence applies. Gaps or overlaps between print runs are a common source of confusion for operators managing several properties or events at once. A quick spot check across a sample range, rather than a full manual count, is usually enough to catch a sequencing error before it reaches the valet stand or gate.

Verification of security features for ticket printing
Tickets handling cash transactions, valet claims, or access control often carry security features specifically to deter counterfeiting and unauthorized duplication. Watermarks, microtext, and UV-reactive elements all need a dedicated check during proofing because they are easy to overlook on a standard screen proof.
Microtext in particular needs a physical, full-size proof to confirm it remains legible and did not blur or drop out during output, since this kind of fine detail often performs differently on-screen than on press. UV elements require a verification pass under a UV light source rather than visual inspection in normal lighting, since they are invisible until illuminated correctly. Watermarks, when used, should be checked for consistent placement and density across the full print run, not just the first few sheets off the press.

For operators managing high-value transactions or sensitive access points, confirming these features during the proofing stage, rather than catching an inconsistency after a full print run ships, saves both cost and the credibility of the security measure itself. Any security feature worth including is worth verifying on an actual printed sample before approval.
Ticket stock durability considerations for your usage environment
The right paper stock depends heavily on where and how a ticket will be used, and that consideration belongs in the proofing conversation, not as an afterthought once tickets arrive. A valet ticket that spends a few minutes in a driver’s pocket has very different durability needs than a parking permit hang tag that rides on a rearview mirror for months in direct sunlight and temperature swings.
Thermal tickets, common in machine-issued “spitter” formats, can fade if exposed to heat or prolonged sunlight, so confirm the stock is rated for the expected exposure before committing to a large run. Tickets handled outdoors, at a valet stand or parking gate, benefit from a coating or lamination that resists moisture and abrasion, while indoor coat check or bell desk tickets typically do not need the same level of protection. Carbonless multi-part tickets should be tested for legibility through every layer after handling, since repeated folding or pocket wear can degrade the imprint on lower plies faster than the top sheet.
If a ticket will be scanned repeatedly, at entry and exit, for example, confirm the stock and any barcode coating hold up to that handling without smudging or cracking. Requesting a physical sample on the actual proposed stock, rather than relying on a digital description, is the most reliable way to confirm durability before a full production run ships.
Production specialist notes: practical traps and quick wins
Avoid making edits after an agreed proof cutoff. A small layout tweak at that stage can quietly shift barcode placement or throw off a numbering sequence across a multi-part ticket set. Always test QR codes and barcodes on the actual stock after finishing, since laminates and varnishes can degrade scannability even when the original file passed every digital check. Keep the printer’s spec sheet visible in the project folder throughout, so no one on the team is working from an outdated assumption.
— Richard
Caymil’s approach to print-ready ticketing
We know how much a single reprint costs a parking or hospitality operation, not just in materials but in delayed events and frustrated staff, so we build our production process around the same checklist discipline covered here. We have manufactured valet, parking, and event ticketing products designed around the realities of multi-part numbering, barcode durability, and the finishing details that make or break scannability in the field.
If you need barcoded valet tickets built for reliable scanning compatible with systems like Amano, TIBA, SKIDATA, FLASH Parking, Scheidt & Bachmann, and Flowbird, or multi-part valet tickets that keep sequential numbering intact through every carbonless layer, we manufacture to the specs your operation depends on. For operators juggling several properties, our forms for parking and ticket racks round out the supplies needed to keep a lot running smoothly. Browse our ticketing lines and request a quote to get your next print job started with specs that match your exact operational needs.
FAQ
What does a print proof mean?
A print proof is a preview of a print job, either digital or physical, used to confirm layout, color, and content accuracy before full production runs. Reviewing a proof against the final file catches errors while they are still inexpensive to fix.
Can you give examples of print materials used in tickets and related products?
Common print materials in this category include valet tickets, barcode parking tickets, parking permit hang tags, validation tickets, coat check tickets, luggage claim tickets, and coupon books. Each format typically carries its own sequential numbering, barcode, or security feature depending on its use.
What is a printer’s proof called?
A printer’s proof is often called a contract proof when it is used as the agreed-upon reference for color and content that the final production run must match. A hard copy or press proof refers specifically to a physical sample printed to simulate the final output.
What are proofs in printing used for?
Proofs let you verify layout, color accuracy, text, and finishing details before a full print run begins, catching mistakes while they are still a quick fix rather than a costly reprint. They range from quick digital soft proofs to physical hard proofs printed on the actual production stock.
How do I verify barcodes will scan correctly before approving a ticket print job?
Confirm the barcode’s symbology, quiet zone, and contrast match GS1 or ISO specifications, then run a verifier test on a printed sample using the GS1 2D barcode playbook as a reference. Always test on the final substrate and after any finishing, since coatings and folds commonly interfere with scannability.
Sources
- What is preflight? — Dalim
- GS1 2D Barcode creation and printing playbook (1.0)
- Artwork Approval Checklist — ApproveTrail